Mini Cheesecake Jars You Can Make in a Pressure Cooker – Small, Creamy, and Surprisingly Easy
Cheesecake usually feels like a project, but these mini cheesecake jars make it simple. You get the same creamy, rich texture in a cute, single-serve format—no cracking, no water bath stress. Your pressure cooker does the hard work and keeps everything silky and set.
These are perfect for parties, gifting, or just keeping in the fridge for a sweet treat. And yes, you can customize them with your favorite toppings.
What Makes This Recipe So Good
- Foolproof texture: The pressure cooker steams the jars gently, so the cheesecakes set perfectly without cracks.
- No fussy water bath: No juggling hot pans or leaky foil. Just add water to the pot and let it go.
- Portion control: Single servings in jars make it easy to share—or not.
- Fast to make, faster to chill: Small jars cool quicker than a whole cake, so dessert happens sooner.
- Endless flavors: Go classic, or add lemon zest, chocolate, peanut butter, or swirls of jam.
Ingredients Shopping List
- Cream cheese (16 ounces, full-fat, room temperature)
- Granulated sugar (1/2 cup)
- Sour cream (1/3 cup)
- Large eggs (2, room temperature)
- Vanilla extract (2 teaspoons)
- Lemon zest (optional, 1 teaspoon for brightness)
- Salt (a pinch)
- Graham cracker crumbs (3/4 cup)
- Unsalted butter (3 tablespoons, melted)
- Brown sugar (1 tablespoon, optional for crust)
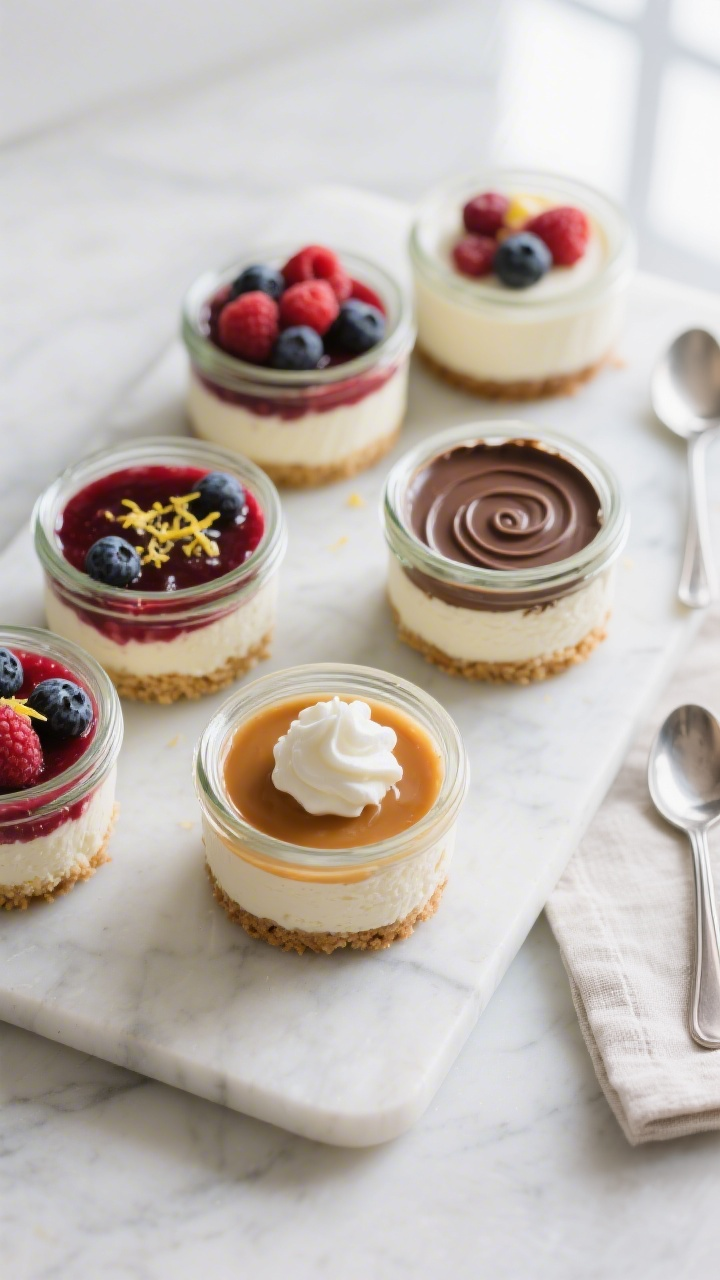
- Toppings: fresh berries, fruit compote, caramel, chocolate ganache, whipped cream, or lemon curd
- Tools: 6–8 small mason jars (4-ounce or 6-ounce, with lids), pressure cooker/Instant Pot, trivet, foil, mixing bowls, hand mixer or stand mixer, spatula
Step-by-Step Instructions
- Prep the jars and pot: Lightly spray the inside of your jars with nonstick spray.
Add 1 cup of water to the pressure cooker. Place the trivet inside.
- Make the crust: Stir graham cracker crumbs, melted butter, and brown sugar (if using) until the texture is like wet sand. It should hold when pressed.
- Pack the crust: Spoon 1–2 tablespoons of the crust into each jar.
Press it down firmly with the back of a spoon. Aim for an even, compact layer.
- Soften the cream cheese: Beat room-temperature cream cheese on medium speed until smooth and fluffy, about 1–2 minutes. Scrape the bowl so there are no lumps.
- Mix in sugar and sour cream: Add granulated sugar and sour cream.
Beat until smooth and glossy. Avoid overmixing.
- Add eggs and flavor: Beat in eggs one at a time on low speed, just until combined. Mix in vanilla, lemon zest (if using), and a pinch of salt. Don’t whip air into the batter.
- Fill the jars: Divide the batter among the jars, leaving about 1/2 inch of headspace.
Gently tap each jar to pop surface bubbles.
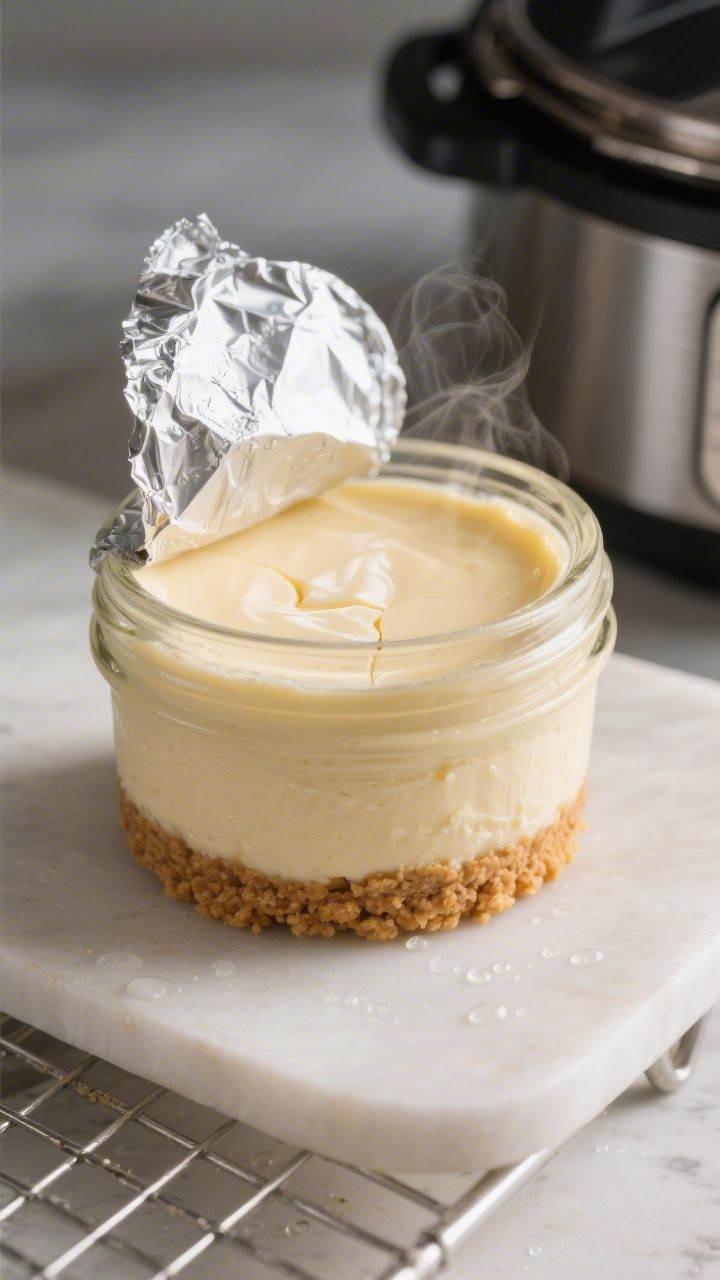
- Cover loosely: Place a small square of foil over each jar. Don’t tighten lids during cooking—you want steam to escape and avoid pressure issues.
- Load the pot: Arrange jars on the trivet in a single layer. If stacking, place a second trivet or a rack between layers and make sure jars aren’t touching the sides.
- Pressure cook: Seal the lid. Cook on High Pressure for 6 minutes (4-ounce jars) or 8 minutes (6-ounce jars).
Let pressure naturally release for 10 minutes, then quick-release the rest.
- Check doneness: The centers should jiggle slightly but not slosh. If very loose, re-cover and cook 1–2 more minutes at pressure with a short natural release.
- Cool correctly: Transfer jars to a cooling rack. Remove the foil to prevent condensation from dripping back in.
Cool to room temperature, about 1 hour.
- Chill to set: Cover with lids and refrigerate at least 4 hours (overnight is best) for the creamiest texture.
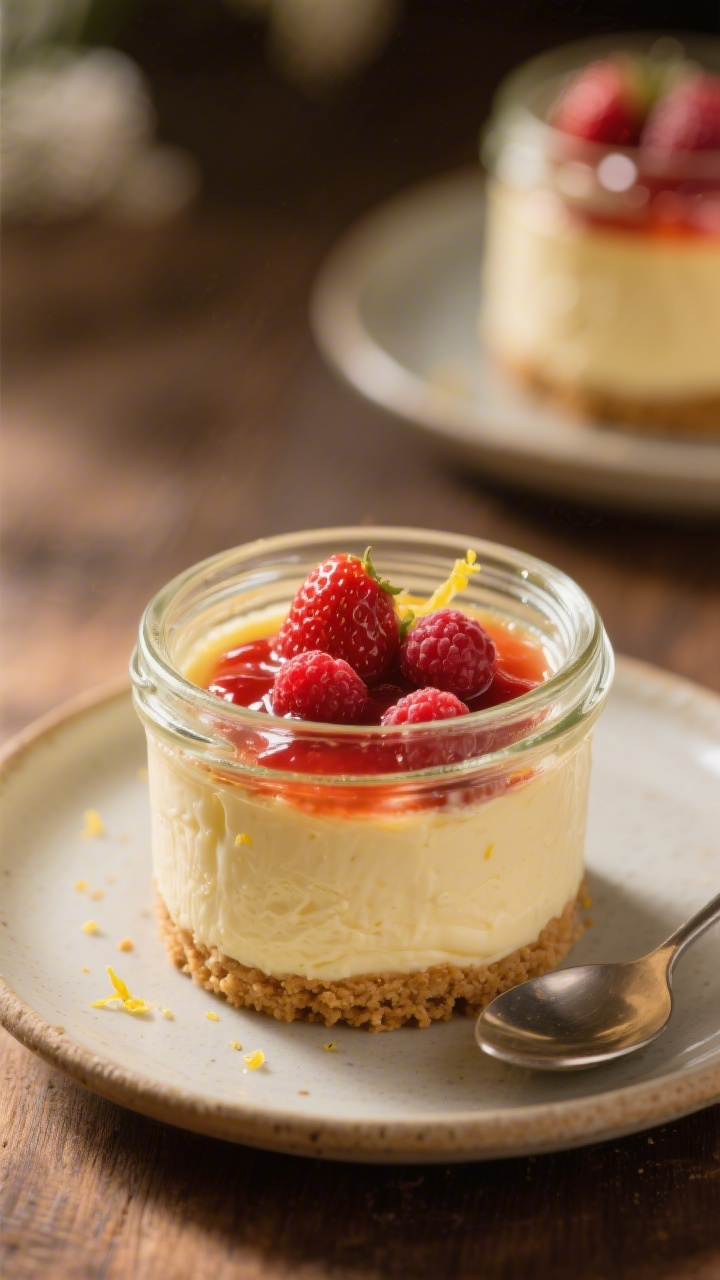
- Add toppings and serve: Top with berries, compote, caramel, or whipped cream right before serving. Enjoy straight from the jar.
How to Store
- Refrigerator: Keep covered in the fridge for up to 5 days. Add toppings just before serving to avoid weeping or soggy fruit.
- Freezer: Freeze without fresh fruit for up to 2 months.
Wrap each jar tightly and thaw overnight in the fridge.
- Meal prep tip: Store crust and cheesecake batter separately for up to 24 hours, then assemble and cook when you’re ready.
Why This is Good for You
- Built-in portion control: Small jars help you enjoy dessert mindfully without overdoing it.
- Protein and satisfaction: Cream cheese and eggs bring protein and fat, which help keep you full longer.
- Lower sugar options: You can reduce sugar slightly or choose fruit-based toppings for a lighter finish.
- Gluten-free friendly: Use gluten-free cookie crumbs for the crust and you’ve got an easy swap.
Common Mistakes to Avoid
- Using cold cream cheese: This causes lumps. Let it sit at room temperature for at least 1 hour.
- Overmixing the batter: Too much air leads to puffing and sinking. Mix just until smooth.
- Overfilling jars: Leave headspace so steam doesn’t cause overflow and the tops stay neat.
- Skipping the natural release: A quick release right away can shock the custard and cause cracks.
- Covering too tightly: Tight lids trap moisture and create a watery top.
Use loose foil during cooking.
- Adding toppings too early: Moist toppings can make the surface runny. Chill fully first, then top.
Alternatives
- Crust swaps: Try chocolate wafer crumbs, Biscoff cookies, shortbread, or almond flour mixed with butter for a gluten-free crust.
- Flavor variations: Mix in 2 tablespoons cocoa powder for chocolate, 2 tablespoons peanut butter for a nutty twist, or swirl 1–2 teaspoons jam into each jar before cooking.
- Citrus pop: Add extra lemon zest and a teaspoon of lemon juice for a brighter profile.
- No-crust option: Skip the crumbs for a lighter dessert. Lightly spray jars and pour in the batter.
- Sweeteners: Use coconut sugar or a bake-friendly sugar substitute.
Taste the batter and adjust gently.
FAQ
Can I use low-fat cream cheese?
Yes, but the texture will be less creamy and a bit more jiggly. For best results, use full-fat cream cheese. If using low-fat, chill overnight to help it set firmly.
Do I need to sterilize the jars?
No, not for this recipe.
Clean, dry jars are fine. The cheesecakes are cooked and then refrigerated, not shelf-stable.
Can I stack jars in the pressure cooker?
Yes. Use a second trivet or a rack between layers, and keep jars from touching the pot’s sides.
Make sure there’s still room for steam to circulate.
How do I prevent condensation on top?
Cover each jar loosely with foil before cooking, then remove the foil as soon as they come out so moisture doesn’t drip back on. Blot gently with a paper towel if needed.
What if I don’t have mason jars?
Any small, heat-safe ramekins or jars work. Avoid thin glass not rated for heat.
If your containers don’t have lids, cover with wrap after cooling.
Why did my cheesecakes crack?
Cracks usually mean too much air in the batter or an abrupt pressure release. Mix on low, avoid whipping, and allow a 10-minute natural release.
Can I make these without a pressure cooker?
Yes. Bake the jars in a 300°F (150°C) oven in a hot water bath for 20–25 minutes, then cool and chill as directed.
How many jars does this make?
This recipe makes about 6–8 jars, depending on whether you use 4-ounce or 6-ounce sizes and how full you like them.
Can I serve them warm?
They’re best after chilling, which sets the texture.
If you prefer a softer, custard-like feel, chill for just 2–3 hours, but they’ll be looser.
Is it safe to pressure cook with lids on?
Do not cook with lids tightened. Use loose foil instead. After cooling, seal with lids for storage.
In Conclusion
Mini cheesecake jars are the easiest way to get classic, creamy cheesecake with none of the drama.
Your pressure cooker handles the gentle heat, and the jars keep portions neat and customizable. Keep a batch in the fridge, switch up toppings, and you’ve got a dependable dessert for weeknights or gatherings. Simple, smooth, and always a hit.
Printable Recipe Card
Want just the essential recipe details without scrolling through the article? Get our printable recipe card with just the ingredients and instructions.