Tender & Juicy Turkey Wings In The Pressure Cooker
If you love tender, fall-off-the-bone turkey but don’t want to wait hours, this turkey wings pressure cooker recipe is your shortcut to rich, soul-warming comfort food. The pressure cooker locks in moisture and infuses bold flavor in a fraction of the time. No babysitting the oven, no dry meat, and no stress.
Just juicy wings with a silky gravy you’ll want to pour over everything. Whether it’s a weeknight dinner or a small holiday meal, this one hits all the right notes.
What Makes This Recipe So Good
- Incredibly tender in less than an hour: Pressure cooking breaks down the connective tissue for meat that slips right off the bone.
- Deep, savory flavor: Browning the wings first builds a rich base, and the sealed environment intensifies your spices and aromatics.
- Hands-off cooking: Once the lid is on, the cooker does the work while you prep sides or relax.
- Perfect gravy built in: The cooking liquid turns into a luscious gravy with a quick cornstarch slurry or reduction.
- Budget-friendly: Turkey wings are affordable and feed a crowd with minimal fuss.
Ingredients
- 3–4 pounds turkey wings, separated at the joint if whole
- 2 tablespoons olive oil or avocado oil
- 1 large yellow onion, sliced
- 4 cloves garlic, minced
- 1 tablespoon tomato paste (optional, for depth)
- 1 cup low-sodium chicken or turkey broth
- 1 tablespoon Worcestershire sauce
- 1 teaspoon apple cider vinegar or lemon juice
- 2 teaspoons kosher salt (adjust to taste)
- 1 teaspoon black pepper
- 1 teaspoon smoked paprika
- 1 teaspoon dried thyme
- 1 teaspoon garlic powder
- 1 teaspoon onion powder
- 1 bay leaf
- 2 tablespoons butter (optional, for finishing)
- 2 tablespoons cornstarch + 2 tablespoons water (for slurry), or 2 tablespoons flour for a roux-style finish
- Fresh parsley or green onion, chopped (for garnish)
Instructions
- Prep the wings: Pat the turkey wings dry with paper towels. Dry skin browns better, which means more flavor.
- Season generously: In a small bowl, mix salt, pepper, smoked paprika, thyme, garlic powder, and onion powder.
Rub the blend all over the wings, coating every surface.
- Sauté aromatics: Set the pressure cooker to Sauté (Medium/High). Add oil, then the onions. Cook 3–4 minutes until softened.
Stir in garlic and tomato paste; cook 30 seconds until fragrant.
- Brown the wings: Push onions to the side. Add wings in batches to avoid crowding. Sear 2–3 minutes per side until golden.
Remove to a plate as you go.
- Deglaze the pot: Pour in broth, Worcestershire, and vinegar. Scrape up browned bits with a wooden spoon. Those bits equal flavor.
- Load and season: Return wings and onions to the pot.
Toss in the bay leaf. Ensure most wings are at least partially submerged.
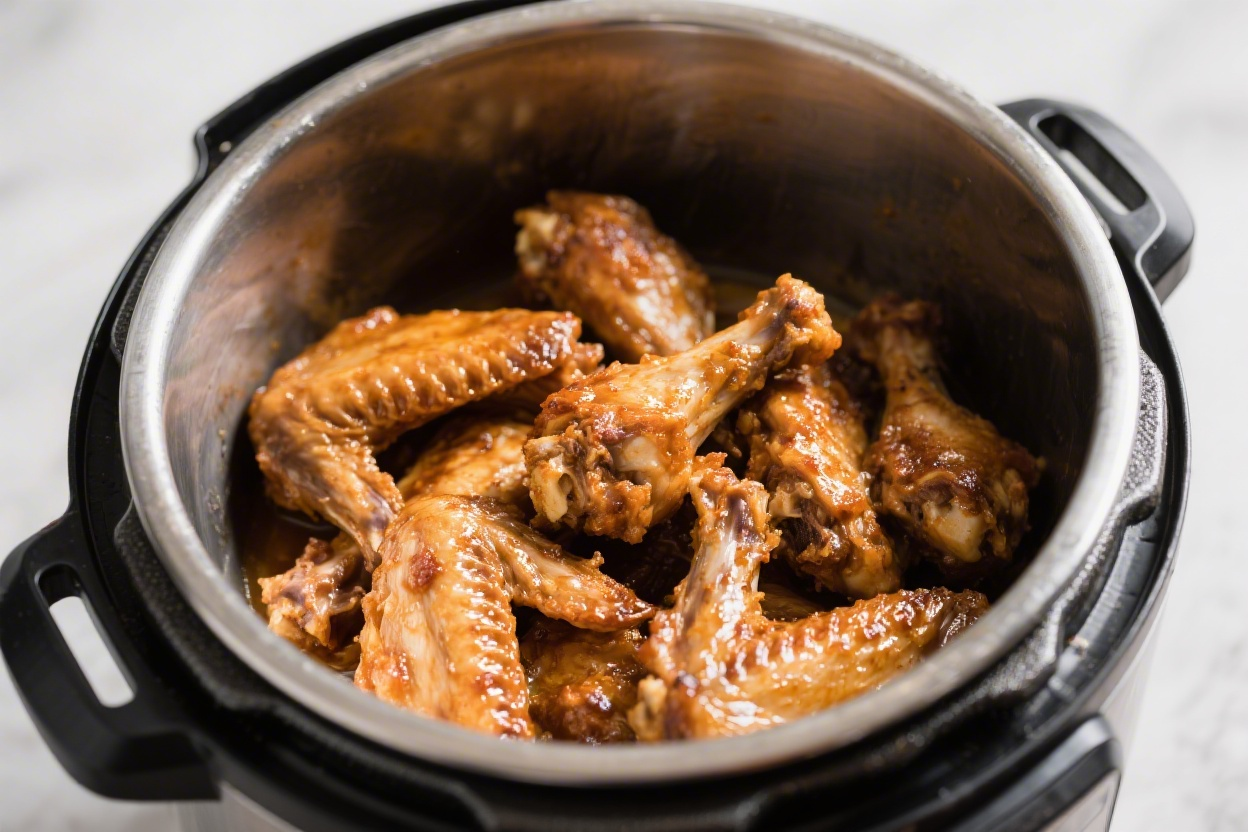
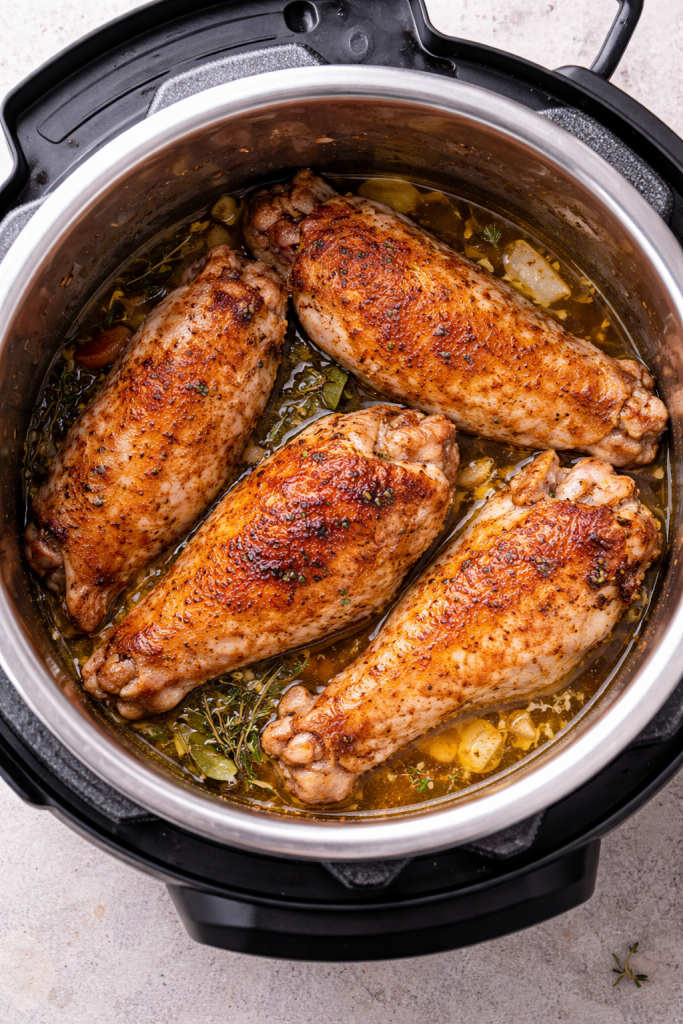
- Pressure cook: Seal the lid. Cook on High Pressure for 30–35 minutes for meaty wings.
Choose 25–28 minutes for smaller pieces. Allow a natural release for 10 minutes, then quick-release any remaining pressure.
- Check tenderness: The wings should be very tender. If not, lock the lid and cook 5 more minutes at High Pressure, then quick-release.
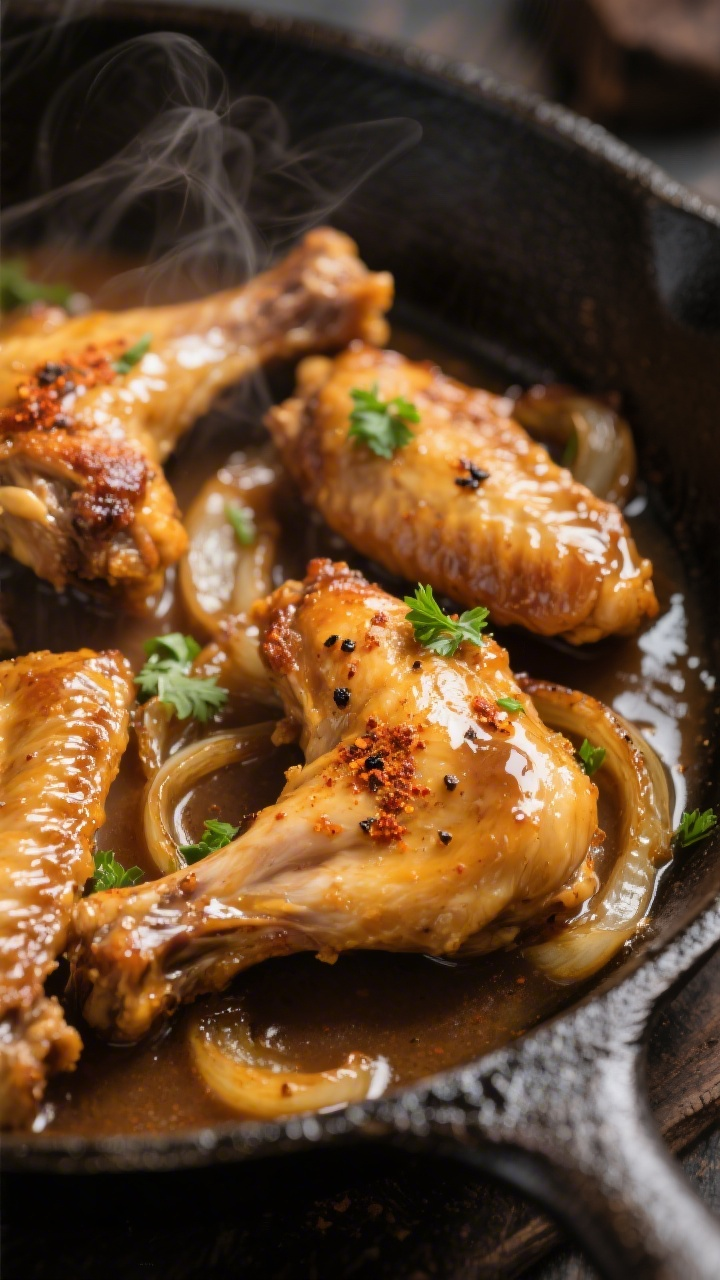
- Make the gravy: Remove wings to a platter and tent with foil.
Set cooker to Sauté. Skim excess fat if desired. Stir in butter (optional).
Whisk cornstarch with water to make a slurry, then drizzle it into the simmering liquid, whisking until thick and glossy, 2–3 minutes. Season with salt and pepper to taste.
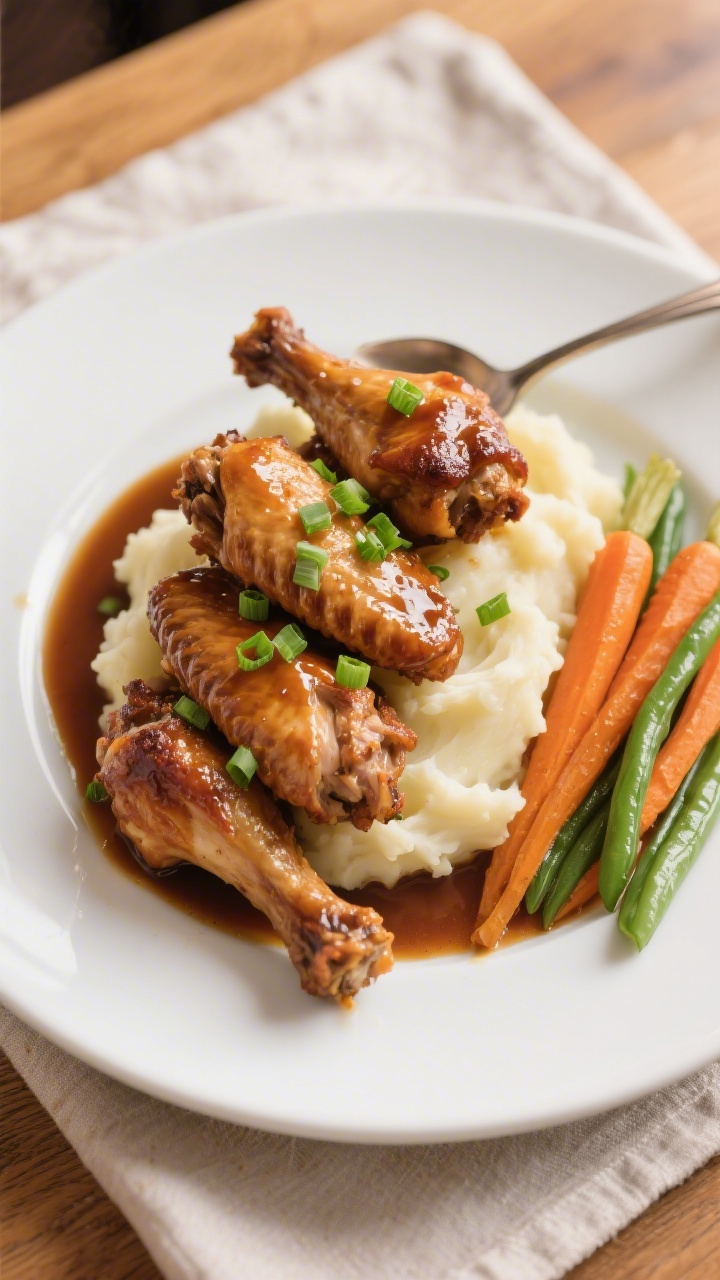
- Serve: Spoon gravy over the wings. Garnish with chopped parsley or green onions.
Pair with rice, mashed potatoes, or roasted veggies.
How to Store
- Refrigerate: Store cooled turkey wings with gravy in an airtight container for up to 4 days.
- Freeze: Freeze in meal-size portions with gravy for up to 3 months. Leave a little headspace to allow for expansion.
- Reheat: Warm gently on the stovetop or in the microwave, adding a splash of broth or water to loosen the gravy. Avoid overcooking to keep the meat tender.
Health Benefits
- Lean protein: Turkey provides high-quality protein to support muscle repair and satiety, especially if you trim excess skin and fat.
- Mineral-rich: Turkey contains selenium, zinc, and iron, which help immune function, metabolism, and oxygen transport.
- Lower sodium control: Making it at home lets you manage salt levels by using low-sodium broth and adjusting seasoning.
- Balanced meal potential: Pairing turkey wings with fiber-rich sides like greens, beans, or roasted vegetables creates a satisfying, nutrient-dense plate.
What Not to Do
- Don’t skip browning: Searing builds flavor and improves the final gravy.
It’s worth the extra minutes.
- Don’t underseason: Turkey needs bold seasoning. Taste the gravy and adjust salt, acid, and pepper before serving.
- Don’t overcrowd while searing: Crowding steams the meat. Brown in batches for that golden crust.
- Don’t rapid-release immediately: A short natural release helps keep the meat juicy and prevents tough textures.
- Don’t forget to deglaze: Those browned bits can burn if left stuck.
Deglazing protects flavor and your pot.
Alternatives
- Flavor profiles: If you dont love the taste of turkey like me, try Cajun seasoning and a splash of hot sauce; or go Caribbean with allspice, thyme, and Scotch bonnet (use sparingly). For a lemon-pepper twist, add lemon zest and extra black pepper.
- Liquid swaps: Use turkey stock, bone broth, or a mix of broth and apple juice for a subtle sweetness. A little dry white wine adds complexity—reduce it during the deglaze step.
- Gravy options: Instead of a cornstarch slurry, make a flour roux: melt 2 tablespoons butter, whisk in 2 tablespoons flour, cook 1 minute, then whisk in strained cooking liquid until thick.
- Veggie add-ins: Add carrot chunks, celery, or mushrooms before pressure cooking to make it a one-pot meal.
Keep pieces large so they don’t overcook.
- Crispy finish: For crispy skin, broil the cooked wings on a sheet pan for 3–5 minutes, then spoon gravy over at the table.
FAQ
Do I need to separate the turkey wings?
Separating the drumette and flat helps them brown evenly and fit better in the pot. If your wings are whole and fit comfortably, you can cook them as is, but you may need a few extra minutes.
Can I make this without browning first?
You can, but the flavor won’t be as deep. Browning adds a roasted note that makes the gravy taste richer.
If you’re short on time, at least sauté the onions and garlic.
How long does it take to come to pressure?
Most electric pressure cookers take about 10–12 minutes to pressurize. That time isn’t included in the pressure cook time, so plan for it when timing your meal.
Is the skin edible after pressure cooking?
Yes, but it won’t be crispy. If you like crisp skin, transfer the wings to a baking sheet and broil briefly after pressure cooking.
Can I use frozen turkey wings?
Yes.
Skip the browning step, season well, add liquids and aromatics, and cook 5–8 minutes longer at High Pressure. Note that the texture and flavor are best when you can brown thawed wings first.
What if my gravy is too salty?
Add a squeeze of lemon juice or a splash of water/broth to balance it out. Unsalted butter can also soften sharp edges.
Next time, start with low-sodium broth and season to taste at the end.
How can I make this spicy?
Add cayenne, red pepper flakes, or a diced jalapeño with the onions. A dash of hot sauce or chipotle in adobo also brings heat and smokiness.
What sides go best with turkey wings?
Mashed potatoes, rice, cornbread, collard greens, green beans, or roasted sweet potatoes are great choices. The gravy ties it all together.
Final Thoughts
Turkey wings in the pressure cooker deliver everything you want from slow-cooked comfort food without the wait.
You get juicy meat, deep flavor, and a silky gravy, all in about an hour. Keep the steps simple—brown, deglaze, pressure cook, and thicken—and you’ll have a reliable meal that works for both busy nights and laid-back Sundays. Serve it with your favorite sides and enjoy the kind of dinner that feels special with minimal effort.
Printable Recipe Card
Want just the essential recipe details without scrolling through the article? Get our printable recipe card with just the ingredients and instructions.