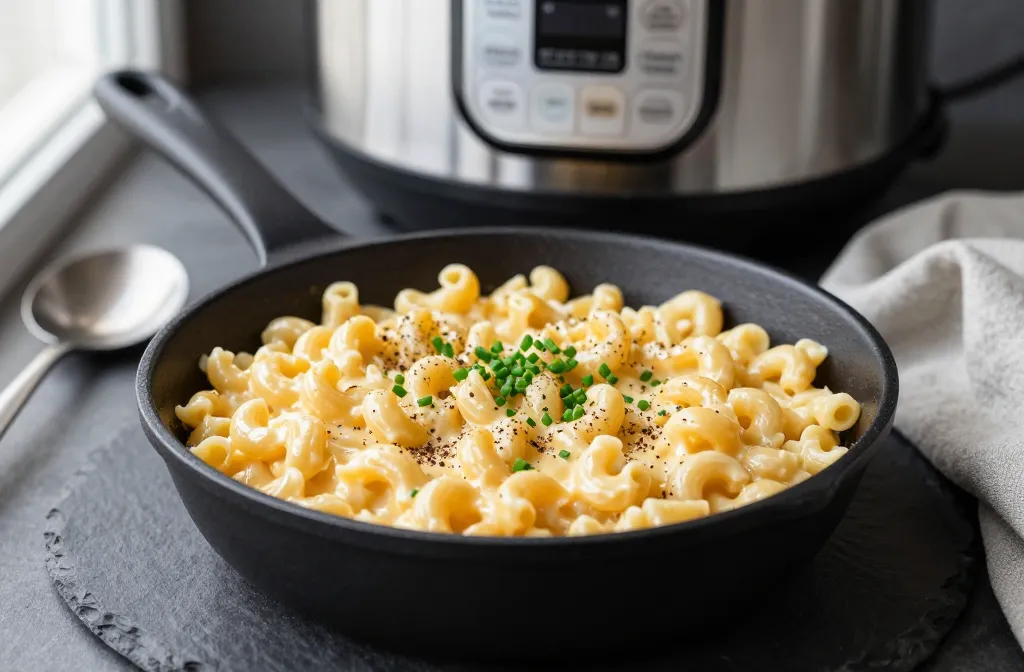
Unbelievably Creamy Mac and Cheese In The Instant Pot
Some nights you just want dinner to show up fast and not leave a mountain of dishes. That’s where Instant Pot mac and cheese walks in like it owns the place. It’s creamy, salty, and exactly the kind of comfort food that doesn’t ask you to think too hard. And yes, it legit tastes like the stovetop version, just done faster and with fewer dishes glaring at you.
A Quick Story From the Mac Trenches
I made this on a Tuesday night when I got home late, cranky, and starving. You know that weird limbo when you’re too hungry to cook but too stubborn to order takeout? That was me. I had exactly half a box of elbows left in the pantry, a block of sharp cheddar, and a belief that dairy could fix my mood.
I threw everything in the Instant Pot, felt weird about not draining anything (because decades of pasta rules), and hit pressure cook. I almost added the milk before the pressure cycle—caught myself mid-pour and yelled “NOPE” out loud like a cartoon character. After it beeped, I stirred in the dairy and cheese and watched it turn into this thick, glossy sauce that clung to every noodle like it meant business. I ate it standing over the counter with a spoon, burnt my tongue a little, and honestly didn’t care. It was one of those nights where mac and cheese basically keeps the world from unraveling.
Why This Classic Creamy Mac and Cheese Recipe Works
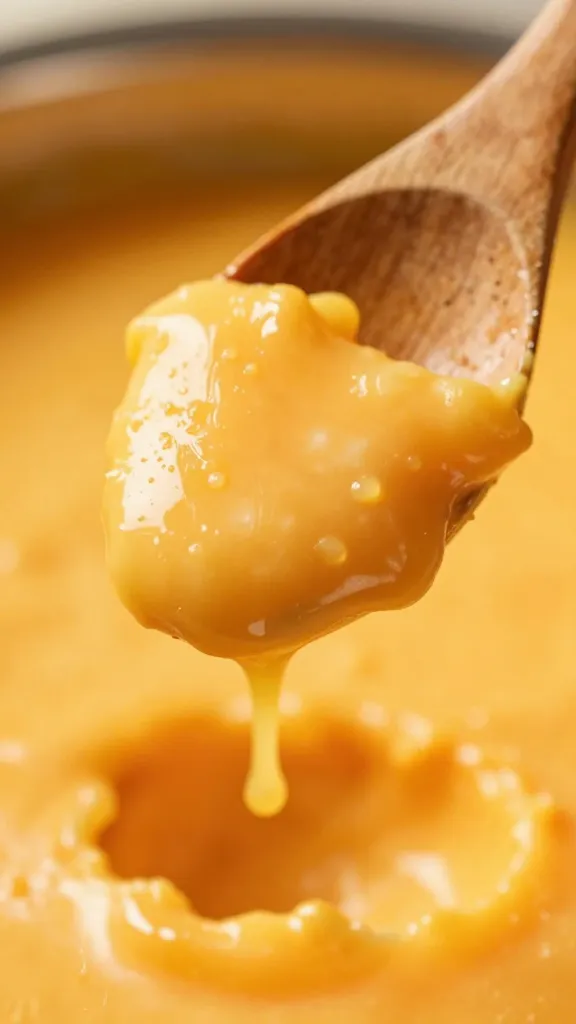
You cook the pasta directly in the broth and seasonings, so the starch stays in the pot and thickens the sauce naturally. No roux, no straining, no juggling three pans while you pretend you’re on a cooking show. I like a mix of sharp cheddar for flavor and a little American or Monterey Jack for melt, I think cheddar only can get grainy and cranky if you treat it wrong.
Compared to the stovetop route, this one keeps things creamy without the flour step or nonstop whisking. And compared to one-pot stovetop, the Instant Pot cooks the pasta evenly and holds heat so your sauce doesn’t split while you panic. Do not skip the step where you add the dairy and cheese after pressure cooking. The residual heat melts everything smoothly, add dairy before pressure and you’ll risk curdled dairy.
Ingredients You’ll Need

- Elbow macaroni: Classic shape, cooks evenly, sauce hugs the curves. Shells also work.
- Low-sodium chicken or vegetable broth: Adds depth. Use water if you must, but you’ll lose a bit of flavor.
- Butter: For richness and silky sauce vibes.
- Evaporated milk: Stable, creamy, and won’t split. Whole milk or half-and-half also work, but evaporated milk is the MVP.
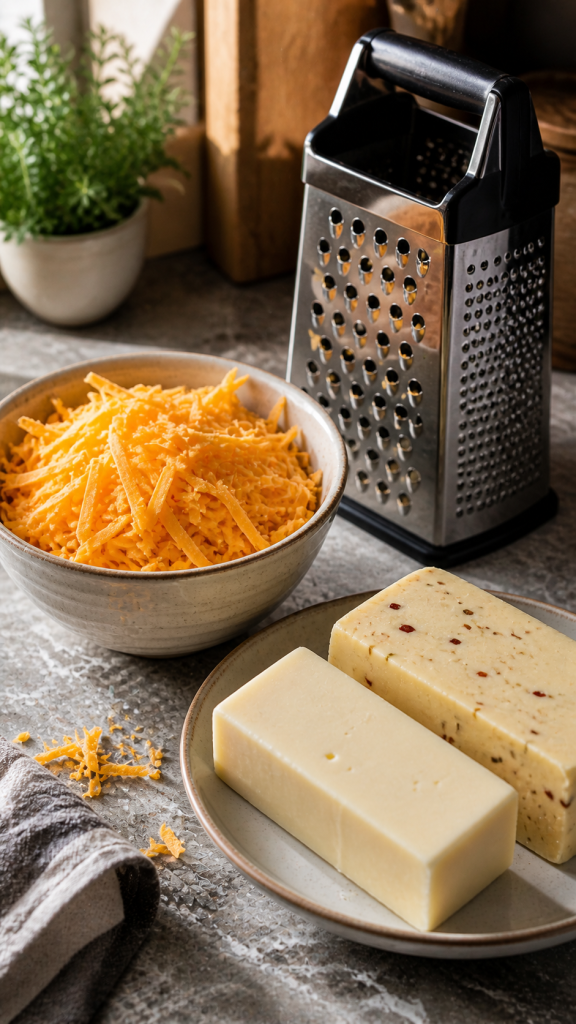
- Cheeses: Sharp cheddar + American (or Monterey Jack) for melt. Freshly grated works best.
- Mustard powder + garlic powder: Tiny amounts wake up the cheese. You won’t taste “mustard,” just tang.
- Hot sauce (optional): A few dashes for brightness, not heat. Trust me.
- Salt and pepper: Start light if your broth has salt. Taste and adjust at the end.
Cheese Tips That Matter
- Grate your cheese fresh. Pre-shredded has anti-caking agents that fight smooth sauce.
- Mix cheeses. Cheddar for flavor + American or Jack for melt = creamy win.
- Room temp or slightly cool cheese. Extreme cold can clump when it hits hot pasta.
Let’s Cook: The No-Drama Method
- Load the pot: Add 1 lb (16 oz) elbow macaroni to the Instant Pot. Pour in 4 cups low-sodium broth, 2 tablespoons butter, 1 teaspoon garlic powder, 1/2 teaspoon mustard powder, and a few grinds of pepper. Don’t add dairy yet. Stir to make sure pasta doesn’t clump.
- Pressure cook: Seal the lid. Cook on High Pressure for 4 minutes. (If your pasta is thicker or whole wheat, go 5 minutes.)
- Quick release: Flip the valve and release steam immediately. Open the lid and give it a stir. You’ll see some starchy liquid—perfect.
- Dairy time: Add 1 cup evaporated milk (or whole milk) and stir. If it looks dry, you can add up to another 1/4–1/2 cup later. Keep it on “Keep Warm.”
- Cheese, gradually: Stir in 3 cups freshly grated sharp cheddar and 1 cup American or Monterey Jack, a handful at a time, stirring between additions until melted and glossy. Add a few dashes hot sauce if you like.
- Taste and season: Salt as needed (broth varies), more pepper if you’re me. If it seems too thick, splash more milk. Too thin? Let it sit 2–3 minutes; it thickens as it stands.
Mistake I Made (Learn From Me)
I dumped all the cheese in at once because I was impatient and, shocker, it clumped. Add it slowly and stir between additions. It melts smoother and you won’t end up with cheese boulders.
Texture Control: Creamy vs. EXTRA Creamy
Want it silkier? Add an extra splash of evaporated milk and a tablespoon of butter. Want it thicker? Let it sit covered for 3–5 minutes and stir again. The pasta drinks up sauce really well.
If It’s Too Salty
Add a splash of milk and a pinch of sugar or a squeeze of lemon to balance. Also, next time use low-sodium broth or go half broth, half water.
If It’s Too Dry
Stir in more milk in 2–3 tablespoon spurts until it loosens. This happened to me when I used a brand of elbows that absorbed broth like a sponge. Small milk additions save the day.
Cheese Combos That Just Work
- Sharp cheddar + American: Classic diner-level creaminess. My go-to, IMO.
- Cheddar + Monterey Jack: Melty and mild, great for kids or spice shy people.
- Gruyère + cheddar: A little nutty, a little fancy. Save for when you want to feel like someone who owns matching wine glasses.
- Pepper Jack + cheddar: Tiny kick, still super creamy.
Cheeses That Can Be Fussy
- All cheddar, extra sharp: Can turn grainy. Balance with a meltier friend.
- Pre-shredded blends: Work in a pinch, but expect a slightly less smooth sauce.
- Parmesan-only: Great topping, not great as the base. It breaks and gets salty.
Add-Ins That Make It Dinner
- Broccoli florets: Steam separately or toss in right after pressure release, lid on for 3 minutes.
- Rotisserie chicken: Stir in bite-size pieces at the end to warm through.
- Crispy bacon: Crumble on top so it stays crisp.
- Green chiles + pepper jack: Low effort, big flavor.
- Hot honey drizzle: A tiny swirl on bowls—sounds weird, tastes amazing.
Breadcrumb Topping (Optional, Worth It)
If you crave crunch, melt 1 tablespoon butter in a skillet, add 1/2 cup panko, and toast until golden. Sprinkle over bowls. It’s like wearing real pants for a Zoom—optional, but you feel more put together.
Timing, Storage, Reheating
- Total time: About 20 minutes, including pressurizing.
- Leftovers: Store in an airtight container up to 4 days.
- Reheat: Add a splash of milk and warm gently on the stove or microwave in short bursts, stirring between. It loosens back up.
- Freezing: Not my favorite for creamy pasta—the sauce can split. If you must, thaw slowly and reheat with milk and a bit of fresh cheese.
Meal Prep Notes
You can grate cheese ahead, portion add-ins, and measure spices. I wouldn’t precook the pasta—Instant Pot makes that step painless, and fresh texture wins.
Common Problems (And Fixes)
My sauce looks grainy
Usually too-hot cheese or cheddar without a melty partner. Kill the heat, add 1–2 tablespoons cream cheese or a splash of milk, and whisk like you mean it. Next time, mix in some American or Jack and add cheese gradually.
It’s super thick, almost sticky
Add warm milk a splash at a time and stir. Starchiness varies by pasta brand, so keep milk handy. Also, don’t walk away for 10 minutes after it’s done—the pasta keeps absorbing.
Mac tastes flat or bland
Salt was shy, or you skipped mustard/hot sauce. Add salt in small pinches, then a dash of mustard or hot sauce to wake it up. Cheese loves acid and a little heat—just enough to be interesting, not spicy.
Scaling the Recipe Without Chaos
You can halve or 1.5x the pasta easily. Keep the liquid at about the same level: just enough to barely cover the noodles. If doubling, watch your pot’s max fill line and expect a longer pressurizing time, but the cook time stays the same.
For Gluten-Free Pasta
Use a sturdy brand and shave a minute off the pressure time. Quick release immediately. Gluten-free pasta swings from al dente to mush fast, so taste and adjust with milk after.
Flavor Twists I Actually Make
- Buffalo mac: Add 2–3 tablespoons buffalo sauce and fold in shredded chicken. Blue cheese crumbles on top if you’re wild.
- Taco mac: Stir in taco seasoning with the broth, use cheddar + Jack, and fold in black beans and corn at the end.
- Caramelized onion mac: Stir in a pile of caramelized onions and a handful of Gruyère. Weeknight bistro, sorta.
FAQ
Can I use water instead of broth?
Yes, but add an extra 1/2 teaspoon salt and consider a pinch of onion or garlic powder for depth. Broth gives you flavor without extra steps, so I reach for it when I can.
What if I only have pre-shredded cheese?
It’ll work, promise. Expect a slightly less silky sauce. Add a splash of milk while melting and be extra patient stirring. A bit of cream cheese (1–2 tablespoons) can help smooth it out.
How do I avoid the burn warning?
Stir the pasta to prevent clumps, make sure the liquid just covers the noodles, and don’t add milk or cheese before pressure cooking. If your pot runs hot, add 1/4 cup extra broth.
Can I make it spicy?
Absolutely. Use pepper jack, add cayenne, or stir in hot sauce at the end. Start small—you can always add more, but you can’t un-spice, FYI.
Is evaporated milk necessary?
Not mandatory, but it gives reliable creaminess and won’t split. Whole milk or half-and-half works too. If using regular milk, warm it slightly before stirring in for the smoothest sauce.
What pasta shapes work best?
Elbows, shells, cavatappi, or small shapes with curves. They trap sauce nicely. Avoid long noodles—Instant Pot cooks them weird and they clump.
Wrapping It Up
This Instant Pot mac and cheese shows up fast, tastes like comfort, and doesn’t need a culinary degree. Keep the dairy for the end, grate your cheese, and you’ll have a creamy pot of happiness on standby—no drama, just dinner. IMO, that’s weeknight gold.